One of the biggest challenges in anAndroid phone is dealing with phone storage and memory issues. Unlike say the iPhone, if you have a 32GB iPhone, you can use the entire space for downloading and using applications. However, with theAndroid model, you get more flexibility in that you can upgrade to a biggerSD card but you are still limited by the number of apps that you can download and run.
Does your phone memory go low when you try to install a new application? Do you get the error message “Phone Storage Space is getting low”? There are some techniques out on the Internet especially those involving moving apps from memory to the SD Card of your phone. But all these solutions require you to root aka jailbreak your phone using something like App2SD application. In this article, we tell you how you can resolve the memory issue on your phone without any of these complicated solutions or jailbreaking your Android Phone.
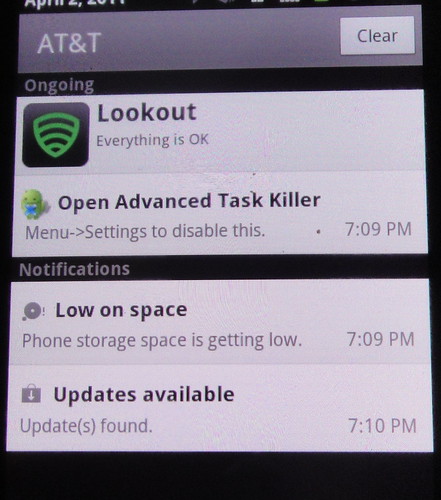
This is how you resolve the Phone Storage Space is getting low issue on Android Phones
Method A: Clear cache and history in your apps
- Go to Settings -> Applications -> Manage Applications to view your apps
- Press the menu button and sort by size
- Go to the apps and clear cache (from the browser app’s settings), mail and other apps
- Also goes without saying, but if you have any apps you do not use or just hogging size, you may want to uninstall them to free up some space
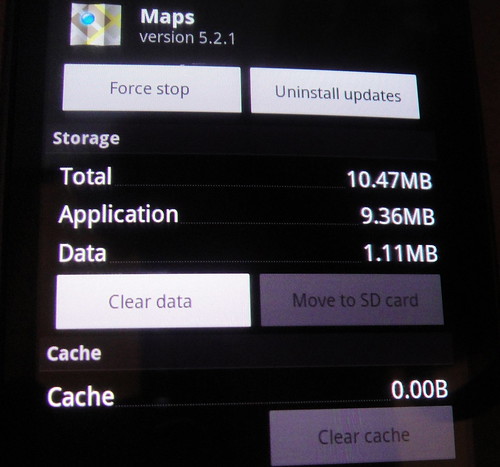
Clear cache and data in Android phone
Method B: Perform a soft reset of your Android Phone
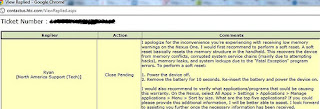
A soft reset basically resets the memory structure of your Android handheld. This recovers the device from memory conflicts, corrupted system service chains, memory leaks, and system lockups due to the “Fatal Exception” program errors. This method was officially suggested by the HTC support for resolving the phone storage space issue and low memory warnings. To perform a soft reset:
- Power the device off
- Remove the battery for 10 seconds
- Re-insert the battery and power the device on
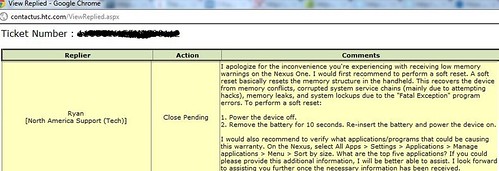
HTC Customer support answer for low memory issue
Method C: Move apps to the SD card instead of memory without rooting your phone
Until now the only way to reduce memory space issues and low storage space issues on Android phones was to move the apps from using the memory to the SD card which has a much bigger storage space. Also, the only way to do this was to use the app called App2SD which required rooting or jailbreaking the phone. Not good because it may void your warranty etc. However, Google listened and with Froyo or Android 2.2 release, they included the App2SD functionality. Many developers however did not choose to use this option. The technique outlined here enables you to movie your apps to the SD card even if the app does not allow it.
Step 1: You need to download the Android SDK to your computer
- Download the Android SDK and run the installer file (recommended option) for Windows. Download the zip file for Mac OS X and Linux
- Run the installer file. You may be asked to download the Java SE Dev Kit (JDK) if you don’t have one
- Finish the installation wizard. By default, the SDK files are installed into a directory named android-sdk-<machine-platform>
- Once done, it will launch the Android SDK and AVD Manager with a recommended set of platforms and components. Simply select Install
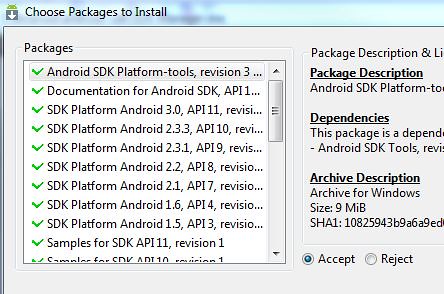
Download Android SDK Packages
Step 2: Now connect your phone to your PC and enable debug mode for your Android phone
USB debugging is intended for development purposes only. It can be used to copy data between your computer and your device, install applications on your device without modification, and read log data.
- Go to Settings -> Applications -> Development and check USB debugging
- You will get a popup to “Allow USB debugging?” – Hit OK
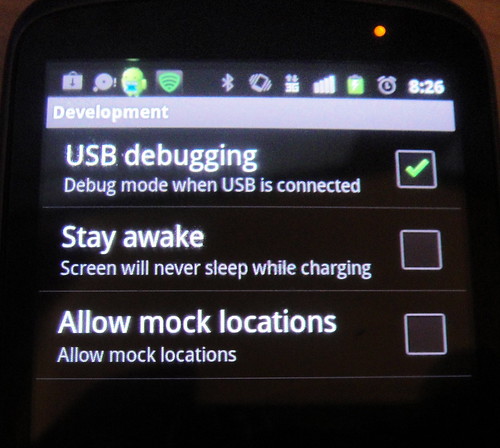
Enable USB debugging mode in Android phone
Step 3: Download the USB drivers for your Android phone
- If you have a Nexus One, Nexus S, T-Mobile G1, T-Mobile myTouch, Verizon Droid or one of the Android Developer Phones, you need the Google USB Driver
- For all other Android phones, you need the OEM driver. Find and Install your OEM USB drivershere
- Launch the SDK and AVD Manager by double-clicking SDK Manager.exe, at the root of your SDK directory
- Expand the Third party Add-ons and Google Inc. add-ons
- Check Google Usb Driver package and click Install selected.Proceed to install the package
- When done, the driver files are downloaded into the <sdk>\google-usb_driver\ directory
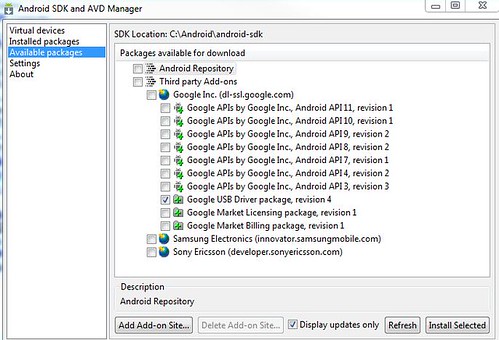
Download USB Drivers for Android phone
Step 4: Windows now needs to install USB drivers for your Android phone
The installation fails and you have to install the drivers manually.
- Right click on My Computer. Select Properties and go to Device Manager
- You will see the missing driver with the exclamation mark on it
- Either double click on right click on it. Select Update Driver Software
- Browse for the USB drivers folder in the Android SDK folder you downloaded and updated in Step 3 earlier. It will be in <sdk>\google-usb_driver\
- Click Next to install the driver. You might get a message asking if you want to install the device software and if you trust the driver publisher. Hit Install.
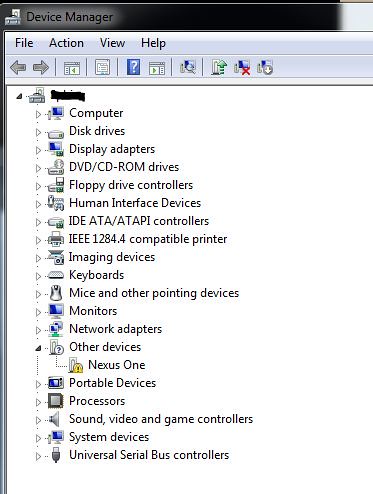
Device Manager showing missing USB drivers for Nexus One
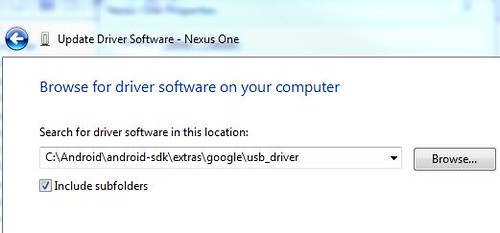
Location for USB drivers for Android phone
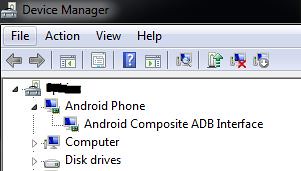
Device Manager showing successful installation of USB Drivers
Step 5: Configure Android phone to install apps on SD Card
- Open the Windows command prompt. You can do this by pressing <Windows key> + R. At the Run prompt, type in cmd
- You need to change your path to the platform-tools folder in the Android SDK you downloaded and installed. Check pictures below for help
- Go to android-sdk folder and then go to platform-tools
- Type adb shell and a $ prompt will appear
- At the $ prompt, type pm setInstallLocation 2 and hit enter. You will get a message of pm setInstallLocation 2 at the $ sign again.
- Close the command prompt by hitting x button
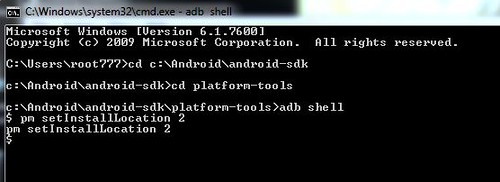
ADB shell commands
Step 6: Cleanup and reboot the Android Phone
- Uncheck the USB debugging option by going to Settings -> Applications -> Development and un-check USB debugging
- Disconnect the phone and reboot it. That’s it !!
Step 7: Move Android applications to SD Card from your phone
- Go to Settings -> Applications -> Manage Applications
- You can start to move applications to SD Card including those you could not move before and start clearing out disk space and low memory
- Make sure you don’t move apps that require a background service running all the time. This includes your task manager apps and a few other apps
- This option also becomes the default. All the apps you install now by default will be installed to the SD Card
- No more Phone Storage Space is getting Low issues for your Android phone
- In the picture below, I moved the AK Notepad app to the SD card and saved some storage space


.jpg)



No comments:
Post a Comment